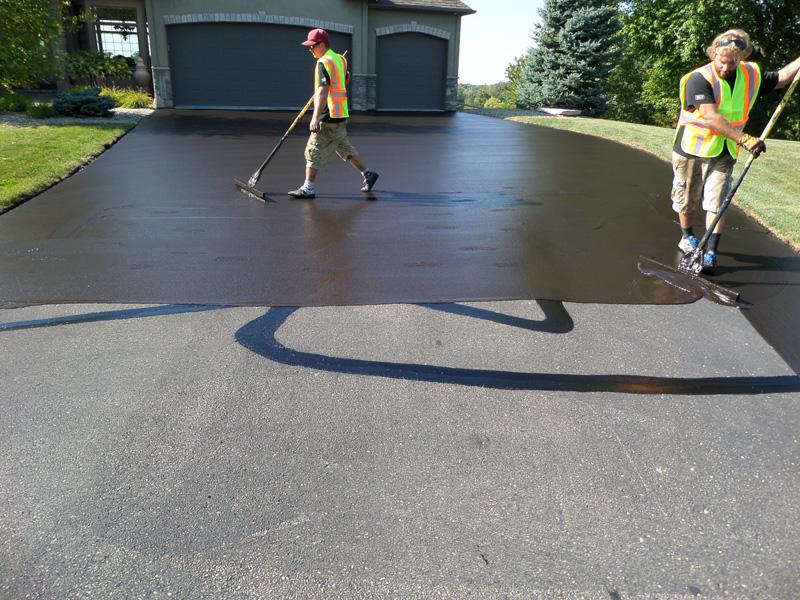
Sealcoating is one of the best ways to protect your driveway from weather, water, oil, and daily wear. To make sure you get the maximum lifespan and best appearance, it’s important to follow a few simple care steps after your service.
🚨 First 24–72 Hours (Most Important)
This is the critical curing period.
Stay off the driveway as much as possible
Avoid vehicles for at least 48 hours
For best results, wait 72 hours before driving on it
👉 In ideal conditions, you may walk on it after a few hours, but vehicle traffic too early can leave tire marks, scuffs, or damage the finish
⚠️ Weather matters:
Cooler, cloudy, or humid days = longer drying time
If unsure, always wait longer (never shorter)
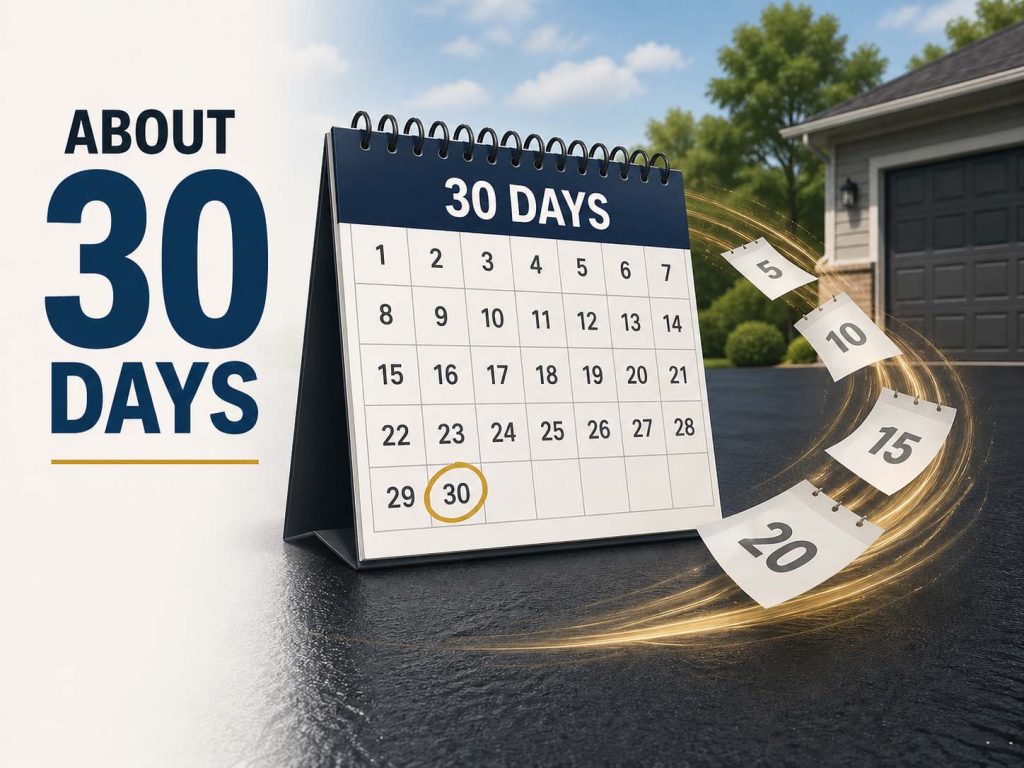
🚗 First 30 Days (Curing Phase)
Even after it looks dry, the surface is still curing.
Avoid turning wheels in place (this can twist and mark the surface)
Try not to park in the same exact spot every day
Avoid heavy vehicles or sharp objects
Be careful with kickstands (motorcycles, bikes)
👉 Full curing can take up to 30 days, so treat the surface gently during this time
🧼 Regular Maintenance
Keep your driveway looking fresh:
Sweep debris regularly (dirt holds moisture)
Rinse occasionally with water
Clean oil or spills as soon as possible
Avoid harsh chemicals or strong degreasers
👉 Sealcoating protects your asphalt, but proper maintenance extends its life even further.
⚠️ What to Avoid
To prevent premature wear:
❌ Turning wheels while stopped
❌ Parking heavy equipment too early
❌ Dragging objects (trash cans, trailers, etc.)
❌ Driving on it if it still feels soft or tacky
🌦 Weather Awareness
Sealcoating performance depends heavily on weather:
Best curing happens in warm, sunny, dry conditions
Rain or humidity can slow the process significantly
If rain happens too soon, contact us—we’ll advise if any touch-up is needed
🛠 When to Sealcoat Again
For best protection:
Reapply sealcoating every 2–3 years
High-traffic driveways may need it sooner
⭐ Final Tip (Most Important)
Sealcoating is not just cosmetic—it’s protection. The better you treat it in the first few days, the longer it will last.
Your new asphalt driveway is a major investment—and how you treat it in the first days and weeks will determine how long it lasts. Fresh asphalt doesn’t harden instantly; it goes through a curing process that can take weeks to fully stabilize.
This guide will walk you through exactly what to do (and what NOT to do) after installation—so you avoid marks, dents, cracks, and premature damage.
Understanding Fresh Asphalt
New asphalt is made of aggregates (stone, sand) bound together with bitumen, a petroleum-based binder. After installation, it begins a curing process where:
Oils slowly evaporate
The surface hardens over time
It becomes more resistant to weight and pressure
👉 Important: Asphalt is never “fully cured” in 24 hours—it continues hardening for 30–90 days.
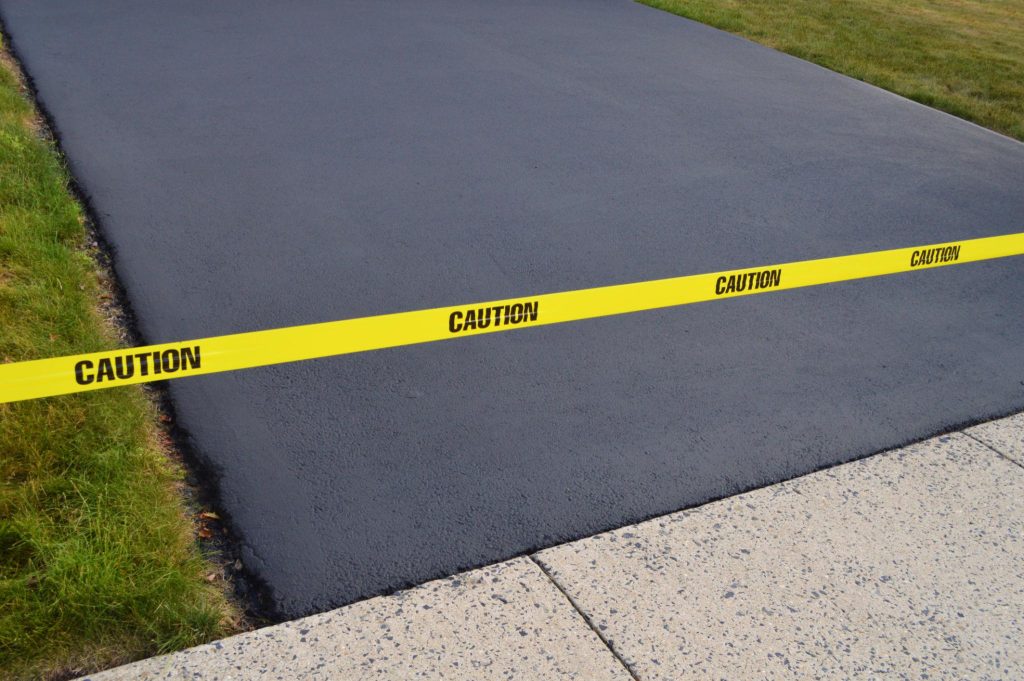
First 24–72 Hours (Critical Period)
🚫 Stay Off the Driveway
No driving for at least 3 days (72 hours)
Light foot traffic is usually okay after 24 hours
Why This Matters
During this phase, the surface is still soft and vulnerable to:
Tire marks
Indentations
Surface shifting
First 30 Days (Most Important Phase)
🚗 Driving Rules
After 3 days, you can drive on it carefully
Avoid:
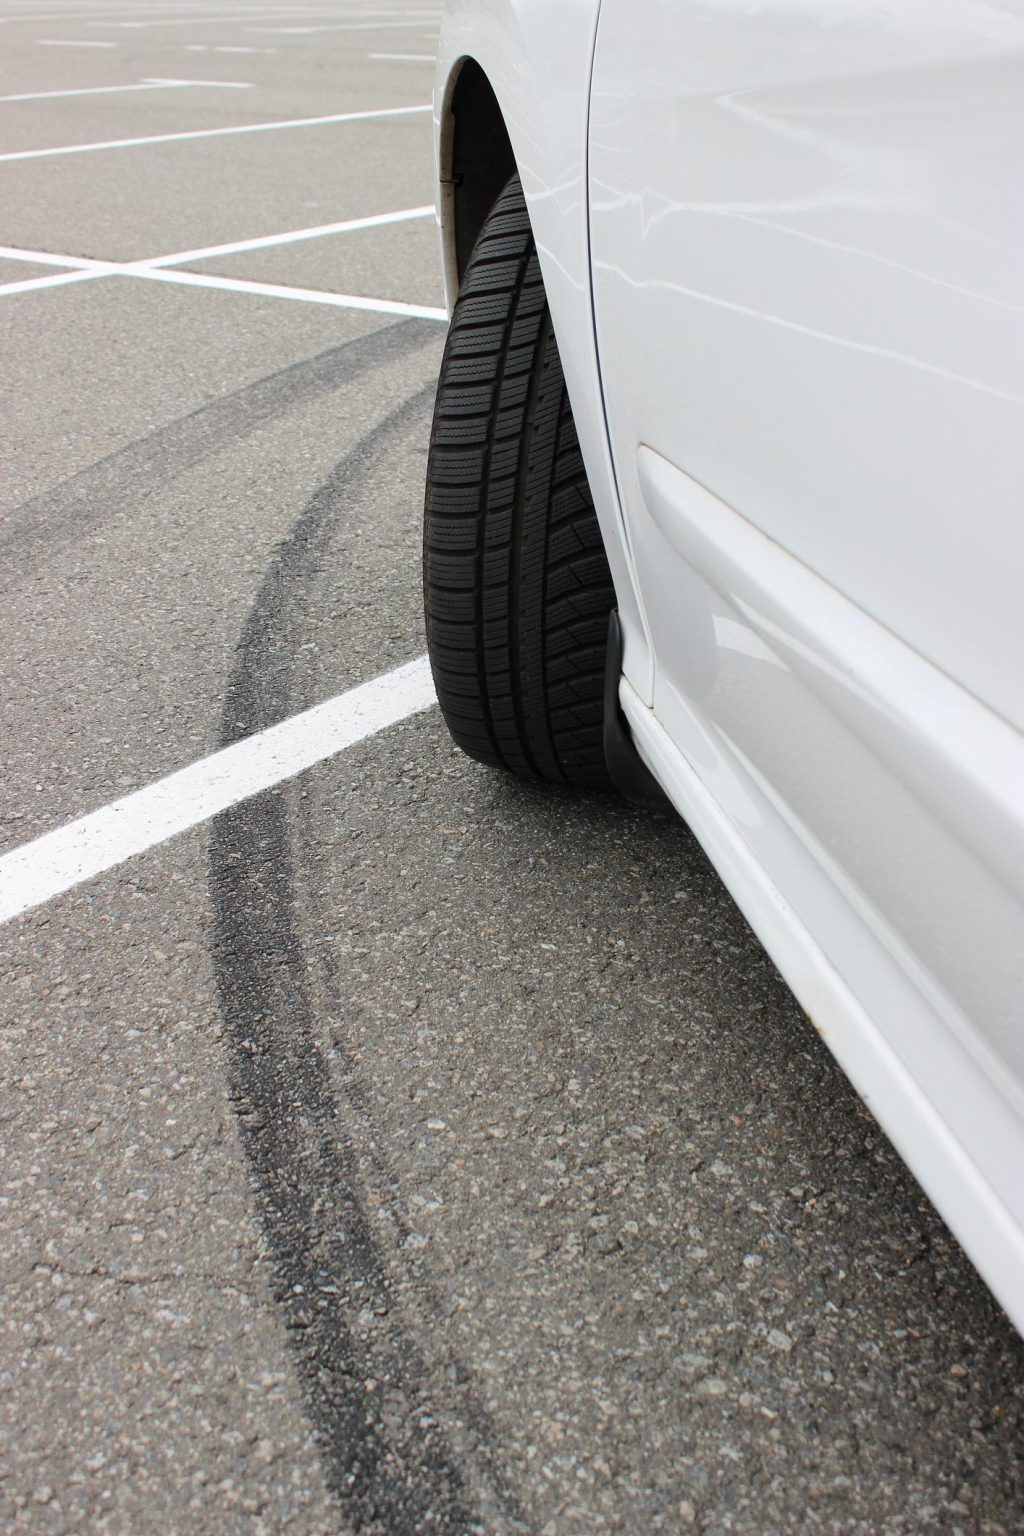
Turning wheels while stopped (this is critical)
Sharp turns or sudden braking
🔄 Do NOT Turn Wheels in Place
Avoid for at least 30 days
Always:
Keep the car moving when turning
Turn the steering wheel only while rolling
👉 This prevents scarring and tearing of the asphalt surface.
Parking Guidelines (Very Important)
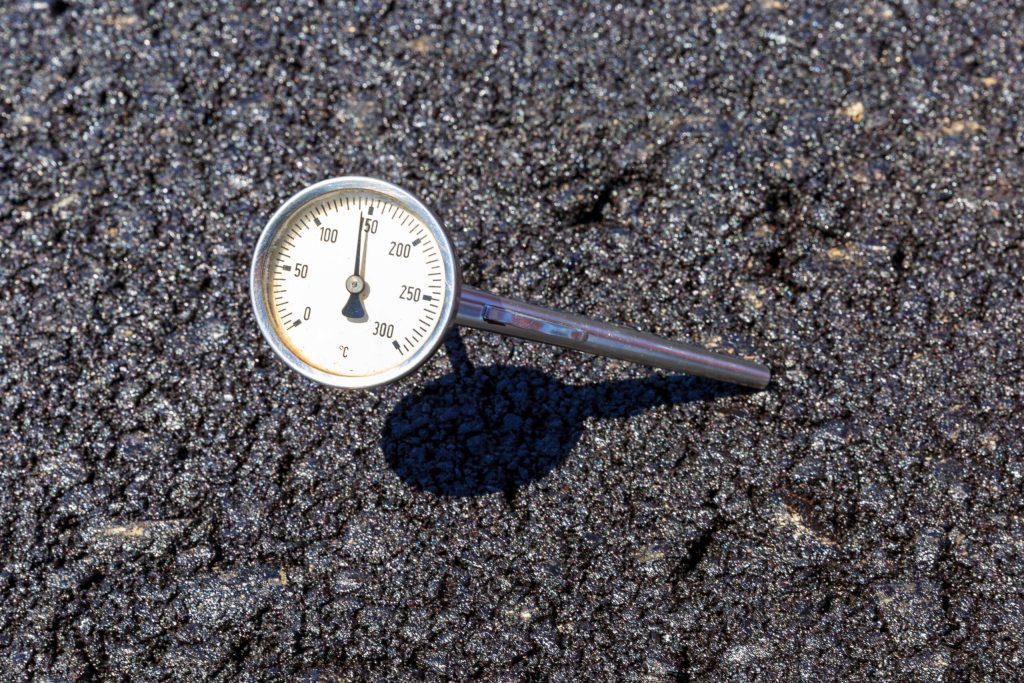
☀️ Hot Weather Warning
Asphalt softens under heat.
Avoid parking in the same spot every day
Rotate parking positions for at least 30 days
What Counts as “Hot”?
Anything above 85°F (29°C) can soften asphalt
At 90–100°F+, the surface becomes significantly softer
⚠️ Avoid These During Hot Days:
Parking heavy vehicles in one spot
Leaving cars parked for long periods in direct sun
Using kickstands (motorcycles can sink!)
👉 Tip: Use a small plate under motorcycle kickstands.
First 90 Days (Full Cure Period)
During this time, your driveway is still strengthening.
Avoid Heavy Loads
No dumpsters
No delivery trucks
No construction equipment
Be Careful With:
Trailers
RVs
Moving trucks
Common Mistakes to Avoid
❌ Turning wheels while stopped ❌ Parking in the same exact spot daily ❌ Letting heavy vehicles sit on it too early ❌ Driving too soon ❌ Ignoring hot weather effects
When Can You Do These?
Activity
Safe Time
Walking
24 hours
Driving
72 hours
Normal parking
3–7 days (with care)
Wheel turning normally
30 days
Heavy loads
60–90 days
Sealcoating
6–12 months
Extra Protection Tips
✔ Keep It Clean
Remove debris regularly
Avoid oil spills (they weaken asphalt)
✔ Watch for Soft Spots
If you notice marks, avoid that area temporarily
✔ Sealcoating (Future Protection)
Apply sealcoat after 6–12 months
Helps protect against:
UV damage
Water penetration
Cracking
Why Proper Care Matters
Taking care of your new driveway:
Extends lifespan by years
Prevents early cracking and deformation
Keeps your driveway looking clean and professional
Saves you money on repairs
Frequently Asked Questions
How long before I can drive on new asphalt?
👉 Typically 72 hours, depending on weather.
Can I park right after 3 days?
👉 Yes, but avoid staying in one spot too long and rotate positions.
Why can’t I turn my wheels in place?
👉 It can tear and twist the soft asphalt surface.
How long does asphalt take to fully cure?
👉 About 30–90 days.
Is it normal to see marks early on?
👉 Yes, especially in heat—but they should be avoided as much as possible.
Can hot weather damage new asphalt?
👉 Yes. Heat softens it, making it easier to dent or mark.
When should I sealcoat?
👉 After 6 to 12 months.
What if I accidentally leave marks?
👉 Most minor marks fade over time, but deep damage may require repair.
Final Thoughts
Your driveway may look finished—but it’s still in a sensitive curing stage. With just a little care in the first few weeks, you’ll protect your investment and keep it looking perfect for years.
Sealcoating is widely recommended as part of asphalt driveway maintenance, but homeowners often ask a fair question: Are there any negatives to sealing a driveway?
The honest answer is yes — there can be, depending on the condition of the asphalt, how the sealcoat is applied, and the materials used. Sealcoating is a protective maintenance layer, not a repair solution. When it’s used improperly, it can create problems instead of preventing them.
As someone who works with asphalt in Massachusetts climates, especially across North and Central areas like Worcester, Lowell, Leominster, Fitchburg, and Lawrence, we often see driveways that were sealed too early, sealed too frequently, or sealed without fixing underlying damage.
Understanding the potential downsides helps homeowners make better decisions about when sealcoating is actually beneficial — and when it isn’t.
1. Sealcoating Doesn’t Fix Structural Problems
One of the biggest misconceptions about sealcoating is that it repairs asphalt damage.
It doesn’t.
Sealcoat is simply a thin protective coating applied to the surface of the pavement. If a driveway already has structural issues beneath the surface, sealing it only hides the problem temporarily.
Common issues sealcoating cannot fix include:
Deep cracking
Base failure
Potholes
Severe asphalt fatigue
Sink areas caused by drainage problems
In fact, sealing a damaged driveway without repairing it first can make the problem worse because water continues entering through cracks underneath the coating.
Another downside occurs when homeowners seal their driveway too frequently.
Some contractors push annual sealcoating, but in most residential situations that isn’t necessary.
When sealcoat is applied repeatedly without proper cleaning or surface preparation, it can create a thick buildup of layers that begins to flake or peel over time.
This is sometimes called sealcoat delamination.
Instead of bonding to the asphalt, new layers begin bonding to older, weaker layers — eventually causing the surface to break apart.
In Massachusetts climates, sealing every 2–3 years is typically the most effective schedule for residential driveways.
3. Poor-Quality Sealcoat Materials Wear Out Quickly
Not all sealcoating products are the same.
Some lower-quality materials — particularly those used in DIY driveway kits or extremely low-cost contractor jobs — contain heavily diluted sealers.
These thin coatings may:
wear off within a year
fade quickly
provide little protection against water
leave uneven surfaces
When inferior sealers fail prematurely, homeowners sometimes assume sealcoating itself doesn’t work, when in reality the issue was the material quality.
Professional-grade commercial sealers contain stronger binders and additives that help them withstand traffic and weather.
4. Slippery Surfaces Immediately After Application
Fresh sealcoat can be temporarily slippery, especially if it gets wet before it fully cures.
This is most noticeable:
during the first 24–48 hours
on steep driveways
during rainy weather
While this usually resolves after the coating fully cures, it’s one reason why proper drying time is critical before allowing vehicles back on the surface.
Experienced contractors control this by:
applying thin, even coats
allowing adequate curing time
monitoring weather conditions
5. Sealcoating Can Trap Moisture in Damaged Asphalt
If a driveway already has water trapped beneath the asphalt, sealing the surface may lock that moisture inside.
This can happen when:
cracks were not properly repaired
the base layer has poor drainage
sealcoat is applied over damp pavement
When winter arrives in Massachusetts and temperatures drop, trapped water freezes and expands, leading to accelerated cracking.
That’s why professional preparation always includes:
crack sealing
proper cleaning
ensuring the pavement is completely dry
Skipping these steps is one of the biggest reasons sealcoating sometimes fails.
6. Sealcoating Doesn’t Last Forever
Some homeowners expect sealcoating to be a long-term fix that lasts many years.
Under these conditions, sealcoating protects the pavement from oxidation, water infiltration, and surface wear.
Situations Where Sealcoating Is NOT Recommended
There are also times when sealing a driveway simply isn’t the right solution.
Sealcoating may not be worthwhile if the driveway has:
widespread cracking
deep potholes
severe edge deterioration
major base failure
large areas of crumbling asphalt
In these cases, repairs or resurfacing are usually more effective than simply applying a new coating.
The Real Key: Proper Preparation
Most of the negatives associated with driveway sealing come down to poor preparation and unrealistic expectations.
When sealcoating is treated as a maintenance step — not a shortcut for repairing damage — it performs exactly as intended.
A properly maintained asphalt driveway in Massachusetts can last 20–30 years when it receives:
early crack repairs
occasional patching
periodic sealcoating
proper drainage
Skipping these steps is usually what shortens pavement life.
FAQ: Driveway Sealcoating Concerns
Is sealing a driveway bad for asphalt?
No. Sealcoating is beneficial when applied correctly, but sealing damaged pavement without repairs can hide problems instead of fixing them.
Can you sealcoat a driveway too much?
Yes. Applying sealcoat every year can cause layer buildup that eventually flakes or peels.
Does sealcoating damage asphalt?
Sealcoating itself does not damage asphalt, but poor-quality materials or improper application can create surface problems.
Is driveway sealing necessary?
While not strictly required, sealcoating significantly slows oxidation and helps extend the life of asphalt pavement.
Why do some driveways peel after sealing?
Peeling usually occurs when sealcoat is applied over dirty pavement, over old layers, or when low-quality materials are used.
Should cracked driveways be sealed?
Cracks should always be repaired first. Sealcoating should only be applied after crack filling or patching.
Final Thoughts
Sealcoating has a strong reputation in the asphalt industry because when it’s done correctly, it works.
However, it’s not a miracle fix, and it shouldn’t be used to hide underlying pavement problems.
The real key is understanding when sealcoating is appropriate and ensuring the driveway is properly prepared before application.
For homeowners in North and Central Massachusetts, maintaining asphalt against freeze-thaw cycles, snowmelt, and road salt requires a balanced approach: repairs when needed and sealcoating at the right intervals.
That combination is what keeps driveways lasting decades instead of failing prematurely.
For many Massachusetts homeowners, an asphalt driveway is a major investment. Naturally, one of the most common questions people ask is: how long does sealcoating last?
Sealcoating protects asphalt from water damage, UV oxidation, oil stains, and the harsh freeze-thaw cycles common across North and Central Massachusetts. Without this protective layer, driveways can deteriorate quickly, leading to cracking, potholes, and costly repairs.
In cities like Lowell, Worcester, Fitchburg, Leominster, and Lawrence, homeowners deal with some of the toughest pavement conditions in New England. Snow, road salt, spring thaw, and heavy rain all accelerate asphalt aging.
The good news is that when applied properly, sealcoating can significantly extend the life of your driveway.
In this guide, we’ll explain:
How long sealcoating typically lasts
What affects its durability in Massachusetts
Signs your driveway needs resealing
How homeowners can extend their pavement lifespan
Understanding Sealcoating and What It Does
Sealcoating is a protective liquid layer applied over asphalt pavement. Once cured, it forms a barrier that shields the driveway from environmental damage.
Think of it like sunscreen for asphalt.
Without sealcoating, asphalt binders begin to oxidize. This causes the pavement to dry out, become brittle, and eventually crack.
Sealcoating helps prevent:
Asphalt oxidation from sunlight
Water infiltration into pavement
Damage from winter salt
Oil and gasoline stains
Surface wear from vehicles
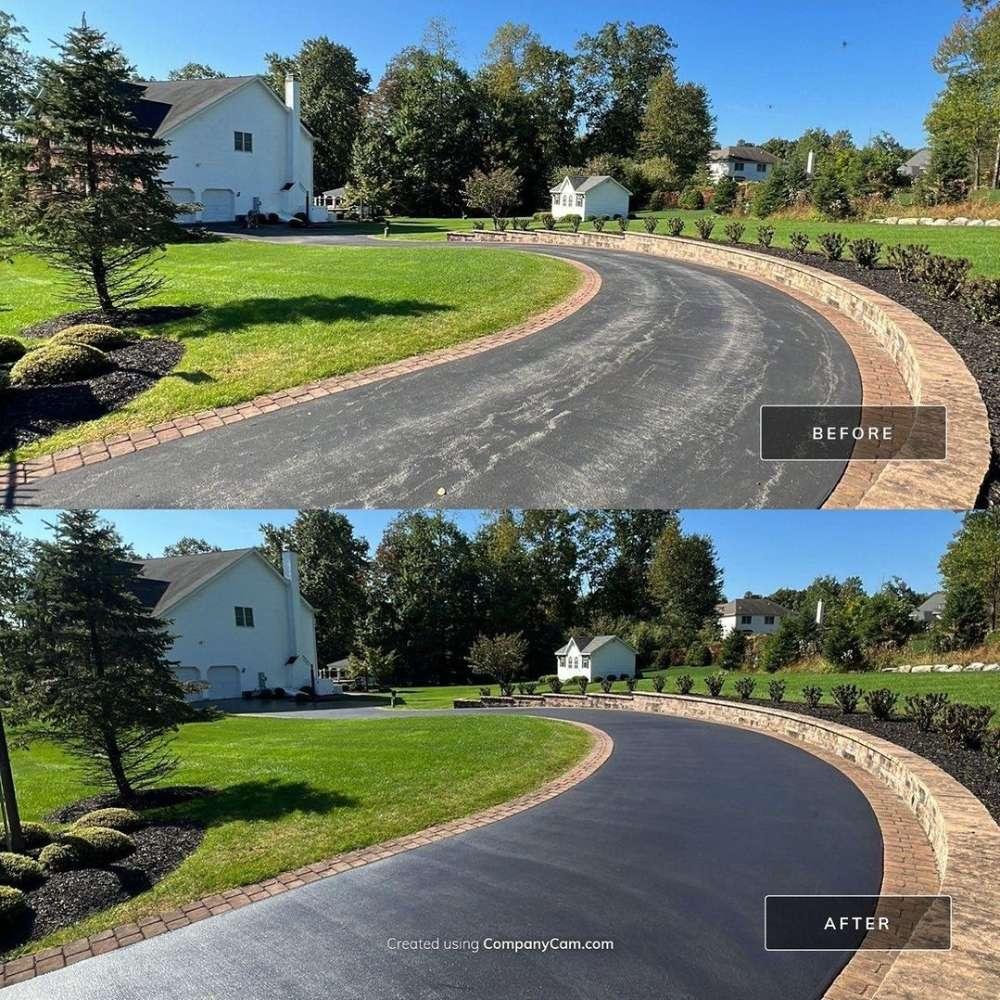
Professional seal coating services can restore the dark black appearance of asphalt while providing essential protection.
How Long Sealcoating Typically Lasts
On average, sealcoating lasts 2 to 3 years in Massachusetts.
However, the lifespan depends heavily on environmental conditions, traffic levels, and how well the driveway was prepared before application.
Typical Lifespan by Conditions
Condition
Expected Lifespan
Light residential driveway
3 years
Moderate traffic driveway
2–3 years
High traffic or steep driveways
1–2 years
Poor drainage areas
1–2 years
In North and Central Massachusetts, most homeowners should plan to reseal every 2–3 years due to the region’s harsh winters.
Why Sealcoating Wears Down Faster in Massachusetts
Massachusetts has one of the most aggressive climates for asphalt deterioration in the United States.
Several local factors shorten sealcoat lifespan.
Freeze-Thaw Cycles
During winter, temperatures frequently fluctuate above and below freezing.
Water seeps into microscopic asphalt pores, freezes, expands, and weakens the pavement structure. This process slowly breaks down the sealcoat layer.
Road Salt and De-icing Chemicals
Cities like Worcester, Lowell, and Fitchburg rely heavily on salt during winter storms.
Salt accelerates asphalt oxidation and can gradually wear down sealcoat protection.
UV Oxidation
Even in colder climates, ultraviolet sunlight breaks down asphalt binders over time. This causes driveways to turn from black to gray.
Sealcoating slows this oxidation process.
Heavy Snow Removal
Plow blades and snow shovels can gradually scrape sealcoat surfaces, especially during rough winters.
Signs Your Driveway Needs Resealing
Many homeowners wait too long before resealing their driveway.
Watch for these warning signs.
Visual Signs
Asphalt turning gray instead of black
Surface looks dry or faded
Small hairline cracks forming
Water soaking into the pavement instead of beading
Yes. Sealcoating is one of the most cost-effective ways to extend driveway lifespan and prevent expensive repairs.
How soon can you drive on a sealed driveway?
Most sealcoating projects require 24–48 hours of curing time before vehicles should return.
Can sealcoating be applied in cold weather?
No. Sealcoating should not be applied when temperatures fall below 50°F, as it will not cure properly.
For homeowners in North and Central Massachusetts, sealcoating is essential for protecting asphalt from harsh winters, snowmelt, and seasonal temperature swings.
In most cases, sealcoating lasts between 2 and 3 years, depending on traffic, weather exposure, and driveway condition.
Regular maintenance, early crack repair, and professional application can significantly extend the lifespan of your asphalt driveway.
If your driveway is beginning to fade, crack, or absorb water, it may be time to reseal it before larger repairs become necessary.
Taking action early can prevent small pavement issues from turning into expensive driveway replacements.
For many homeowners across Central Massachusetts, driveway maintenance usually isn’t something people think about until problems start appearing. Small cracks, fading asphalt, or water pooling on the surface are often early signs that your driveway is beginning to deteriorate. That’s when many homeowners start asking the question: is driveway sealcoating worth it?
In areas like Leominster, Acton, and Hudson, asphalt driveways face some of the toughest environmental conditions in New England. Winter freeze-thaw cycles, road salt, heavy snow accumulation, and spring meltwater can all accelerate pavement deterioration.
Sealcoating is one of the most commonly recommended forms of asphalt maintenance, but homeowners often wonder whether it’s truly necessary or just an extra expense.
The reality is that sealcoating can significantly extend the life of an asphalt driveway when done at the right time and combined with proper crack repair. In this guide, we’ll break down how sealcoating works, when it’s worth the investment, and how it protects driveways from Massachusetts weather conditions.
Understanding What Driveway Sealcoating Actually Does
Sealcoating is a protective liquid layer applied over asphalt pavement. It acts as a barrier between the driveway surface and damaging environmental elements.
Unlike paving or resurfacing, sealcoating does not add structural strength to asphalt. Instead, its main job is to protect the existing pavement from deterioration.
Professional sealcoating helps protect against:
UV oxidation that dries out asphalt
Water infiltration that causes cracks
Salt damage from winter road treatments
Oil and chemical stains
Surface erosion from traffic
Over time, untreated asphalt becomes brittle and loses the oils that keep it flexible. Once that happens, cracks begin to form, allowing water to seep into the pavement base.
In Massachusetts climates, this process accelerates quickly because water freezes inside the cracks during winter. As the ice expands, it widens the cracks and weakens the driveway structure.
Sealcoating slows this process dramatically.
Why Massachusetts Driveways Deteriorate Faster
Freeze–Thaw Cycles
One of the biggest threats to asphalt driveways in Massachusetts is the constant cycle of freezing and thawing.
Water enters small cracks during warmer daytime temperatures. When nighttime temperatures drop, that water freezes and expands, forcing cracks wider.
This process repeats dozens of times each winter and spring.
Eventually it leads to:
spreading cracks
pothole formation
crumbling edges
base layer damage
Road Salt and De-Icing Chemicals
During winter storms, road salt and de-icing chemicals are commonly used in towns like Leominster and Hudson.
While these products improve road safety, they also accelerate asphalt deterioration by:
breaking down the binder in asphalt
allowing water to penetrate deeper into pavement
weakening the surface structure
Sealcoating acts as a protective barrier against these chemicals.
UV Oxidation
Even in colder climates, ultraviolet sunlight slowly dries out asphalt.
Asphalt contains natural oils that give it flexibility. Over time, sunlight causes these oils to evaporate.
When asphalt loses flexibility, it becomes brittle and begins cracking.
Sealcoating helps restore a protective layer that slows oxidation.
Signs Your Driveway Needs Sealcoating
Many homeowners wait too long before maintaining their driveway. By the time major cracks appear, the asphalt may already be significantly damaged.
Here are some early warning signs to watch for.
Visual Signs
Faded gray asphalt instead of deep black color
Small surface cracks beginning to form
Rough or dry texture
Water soaking into the pavement instead of beading
Slight surface erosion
Structural Warning Signs
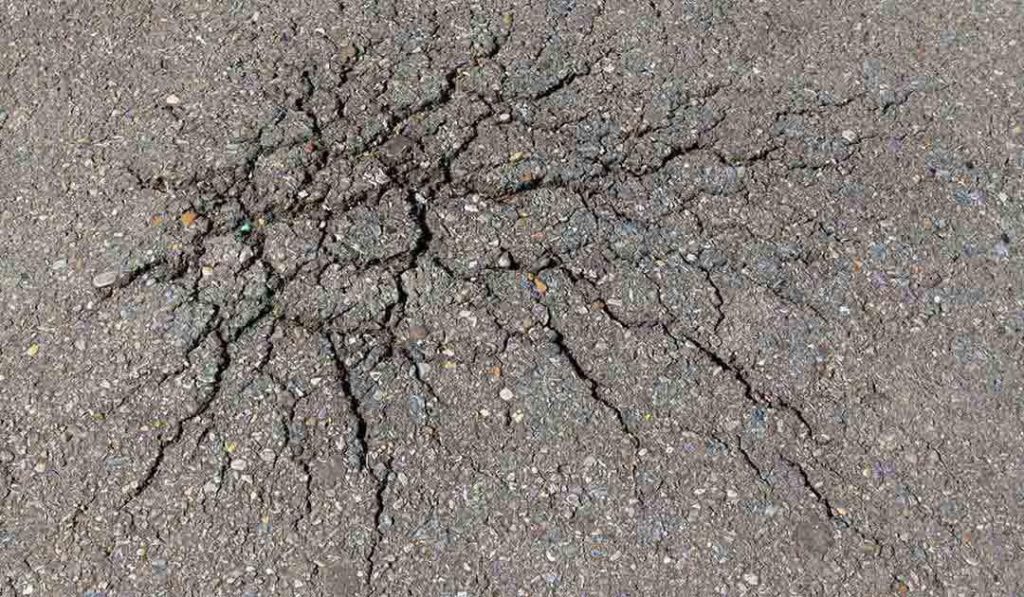
Spiderweb cracking patterns
expanding crack lines
loose asphalt particles
edges beginning to crumble
If cracks are already present, they should be repaired before sealcoating. Professional asphalt crack repair and sealing ensures water cannot penetrate beneath the surface.
In some cases, larger damaged sections may require asphalt patching or localized repair before sealcoating can be applied effectively.
What Happens If You Don’t Sealcoat
Homeowners sometimes assume sealcoating is optional cosmetic maintenance. In reality, skipping sealcoating can shorten the lifespan of your driveway significantly.
Without protection, asphalt becomes vulnerable to:
water penetration
surface oxidation
cracking from freeze-thaw cycles
pothole development
structural failure
Once water reaches the base layer beneath the asphalt, repairs become much more expensive.
At that point, homeowners may require:
asphalt patching
resurfacing
or full driveway replacement
Preventive maintenance like sealcoating helps avoid those costly scenarios.
How Sealcoating Protects Your Driveway
Sealcoating provides several layers of protection that directly extend pavement lifespan.
Water Resistance
A properly sealed driveway repels water, preventing moisture from penetrating small surface cracks.
UV Protection
Sealcoat materials block sunlight from drying out asphalt binders.
Chemical Protection
Sealcoating resists oil, gasoline, and salt damage.
Surface Flexibility
By preserving asphalt oils and preventing oxidation, sealcoating helps the driveway remain flexible rather than brittle.
This flexibility is crucial in Massachusetts climates where pavement constantly expands and contracts due to temperature swings.
How Often Should Driveways Be Sealcoated in Massachusetts?
Most asphalt professionals recommend sealcoating every:
2 to 3 years
However, several factors can influence this timeline:
driveway age
traffic levels
sun exposure
existing pavement condition
winter damage
Newly paved asphalt typically should not be sealcoated immediately. Fresh asphalt usually needs 6–12 months to fully cure before sealcoat is applied.
If cracks begin appearing sooner, those areas should be repaired first.
Professional contractors often combine sealcoating with crack sealing services to ensure maximum protection.
DIY vs Professional Sealcoating
Many homeowners consider applying sealcoat themselves using hardware store products. While DIY kits are available, they often provide only temporary results.
DIY Sealcoating
Professional Sealcoating
Thin materials
Commercial-grade sealers
Short lifespan
Long-term protection
Uneven coverage
Proper application equipment
No crack repair
Crack sealing included
Professional contractors typically prepare the surface properly before sealing. This includes cleaning debris, repairing cracks, and applying sealcoat evenly.
For homeowners in towns like Leominster and Acton, hiring a professional ensures the sealcoating is applied at the correct thickness and curing conditions.
Services like professional seal coating services from local contractors help maximize the lifespan of the treatment.
Cost Considerations
Sealcoating is one of the most affordable forms of driveway maintenance.
Several factors affect the total cost:
Driveway Size
Larger driveways require more material and labor.
Existing Damage
If the driveway has cracks, potholes, or deteriorated areas, repairs may be required before sealcoating.
Surface Preparation
Cleaning, crack filling, and patching all influence the final cost.
Accessibility
Driveways with steep slopes or difficult access may require additional preparation.
Compared to the cost of resurfacing or replacing an asphalt driveway, sealcoating is a small investment that can prevent major expenses later.
Preventing Driveway Damage
Sealcoating works best as part of a broader maintenance strategy.
Homeowners can extend driveway lifespan by following several simple practices.
Maintenance Tips
Sealcoat every 2–3 years
Repair cracks early
Remove snow carefully to avoid surface damage
Avoid heavy vehicles on residential driveways
Ensure proper drainage around pavement
Regular maintenance helps asphalt driveways last 20–30 years or longer.
Combining sealcoating with driveway repair services when needed can significantly delay the need for full replacement.
Is Driveway Sealcoating Worth It?
For most homeowners in Massachusetts, the answer is yes.
Because of the region’s harsh winters, asphalt driveways deteriorate faster than in milder climates. Sealcoating helps protect against the exact conditions that cause pavement failure.
When combined with proper crack repair and occasional patching, sealcoating can:
extend driveway lifespan
prevent costly repairs
improve curb appeal
protect against winter damage
Homeowners across Leominster, Hudson, and Acton often find that routine sealcoating every few years is far more affordable than replacing a driveway prematurely.
Companies like Mr Patch Asphalt frequently recommend sealcoating as part of long-term asphalt maintenance, especially for driveways already showing early signs of wear.
FAQ
Is driveway sealcoating really necessary?
Sealcoating is not structurally required, but it protects asphalt from water, UV damage, and salt exposure. In climates like Massachusetts, it significantly slows pavement deterioration.
How long does driveway sealcoating last?
Most professional sealcoating applications last 2–3 years, depending on traffic, weather exposure, and driveway condition.
Should cracks be repaired before sealcoating?
Yes. Cracks should always be sealed or repaired first. Sealcoating alone cannot stop water from entering existing cracks.
Can sealcoating fix driveway cracks?
No. Sealcoating protects the surface but does not repair structural damage. Crack filling or asphalt patching may be required before sealing.
When is the best time to sealcoat a driveway in Massachusetts?
Late spring through early fall is ideal because temperatures need to stay above 50°F for proper curing.
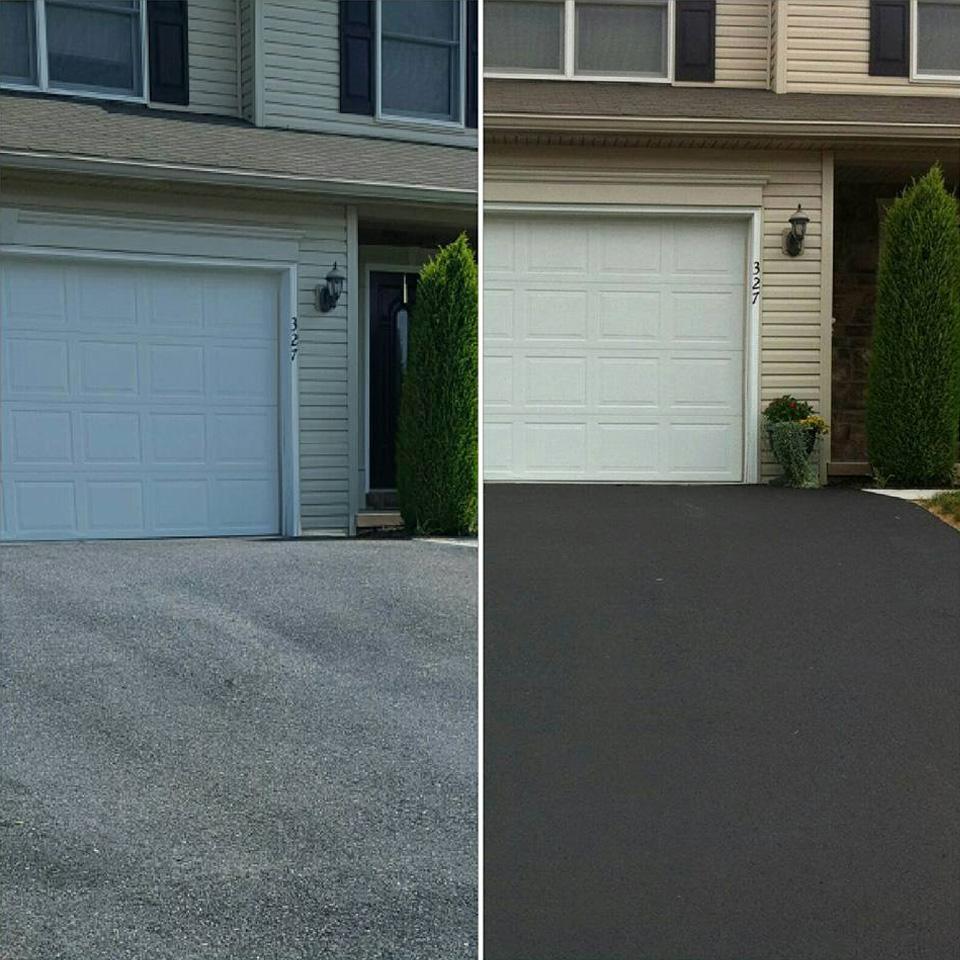
Does sealcoating make a driveway look new?
Sealcoating restores the deep black color of asphalt and greatly improves curb appeal, but it cannot repair major damage.
How long should you wait to drive on a sealed driveway?
Most sealcoated driveways need 24–48 hours to fully cure before vehicles can return.
Is sealcoating cheaper than driveway replacement?
Yes. Sealcoating costs only a small fraction of the price of resurfacing or replacing a driveway.
If you’ve just installed—or are thinking about installing—a new asphalt driveway, you’re probably asking: “How long is this thing going to last me?” Well, the answer isn’t just about the material—it’s about how it’s installed and how you treat it.
At Mr. Patch Asphalt, we do things right from the start. Our driveways feature a robust 3-inch asphalt layer, laid over a properly excavated and graded base. This professional standard is designed not just for looks, but for long-term performance.
So let’s break it down and talk lifespan.
🧱 Average Lifespan of an Asphalt Driveway
Properly installed asphalt driveways can last between 15 to 25 years.
That’s a wide range, right? That’s because several key factors influence how long your driveway will actually survive:
Quality of installation (spoiler: ours is top-notch 👷♂️)
Climate and weather exposure
Traffic load and usage
Ongoing maintenance
With professional installation and routine care, your asphalt driveway can hit the upper end of that spectrum—or even beyond.
📐 Why Thickness & Base Matter: Our 3-Inch Advantage
At Mr. Patch Asphalt, we don’t cut corners. Our process includes:
Proper excavation to remove soft spots and unstable soils.
Grading and compacting the base layer to prevent future sagging.
Installing a full 3 inches of hot mix asphalt, not just a thin skim coat.
Why does this matter? Because thinner driveways with poor prep might last only 8–10 years before major issues like cracking or potholes arise. Our method ensures optimal drainage, load-bearing strength, and surface longevity.
🌡️ Environmental Factors in Massachusetts
Living in Massachusetts means your asphalt is going to face:
Harsh winters with freeze-thaw cycles
Snowplows and deicing salts
Hot summers that soften the surface
These conditions are tough on driveways, which is why local expertise matters. At Mr. Patch Asphalt, we tailor every installation to withstand the New England elements, ensuring a longer-lasting investment.
🛠️ Maintenance: The Key to Longevity
Here’s the secret: Proper maintenance can stretch your driveway’s life by years. Here’s what we recommend:
Seal coat every 2–3 years This protects from UV rays, moisture, and oil spills. (More on our seal coating services here).
Repair cracks and potholes early Catching small damage prevents it from spreading. We offer expert driveway repair and asphalt patching.
Avoid parking heavy vehicles long-term Especially in hot weather—this can cause indentations.
Keep it clean Sweep away debris and hose off oil or chemical stains.
🧮 Asphalt vs. Other Driveway Materials. Here’s how asphalt compares in terms of longevity:
Material
Average Lifespan
Asphalt
15–25 years
Concrete
25–30 years
Gravel
5–10 years (high maintenance)
Pavers
30+ years (high cost)
For most homeowners, asphalt hits the sweet spot—a cost-effective, durable solution with the right balance of longevity and affordability.
✅ Built to Last, Backed by Experience
At Mr. Patch Asphalt, we’ve paved thousands of driveways across Massachusetts with one goal: make it last. Our 3-inch standard, expert grading, and seasoned local knowledge ensure you’re getting a driveway that doesn’t just look great—it stands the test of time.
Whether you’re considering a full driveway replacement or need help with repairs, we’re here to keep your surface strong and smooth for decades to come.
🏁 Ready for a Driveway That Goes the Distance?
If you’re investing in a new asphalt driveway, don’t settle for shortcuts. Our team at Mr. Patch Asphalt delivers durable, high-quality driveways that last—and we back it up with expert service and local experience.
👉 Visit our contact page to get a free estimate today and start your journey to a driveway built to last. Because at Mr. Patch, we don’t just lay asphalt—we lay peace of mind.
Getting a fresh, jet-black driveway is exciting—it boosts curb appeal and offers a smooth, clean entrance to your home. But before you roll your tires over that brand-new surface, you’ve got to wait—and that wait is crucial. Driving too soon on freshly laid asphalt can cause dents, ruts, or even cracks that’ll haunt you for years. Let’s break down how long you need to wait before driving on new asphalt, and why timing is everything.
🕒 The Golden Rule: 72 Hours Minimum
How long should you wait to drive on a new asphalt driveway?
Answer: At least 72 hours. That’s three full days. This is the standard drying—or curing—period required for the asphalt to harden enough to support the weight of a car. During this window, the asphalt is still soft and pliable. Any pressure from tires or feet can leave permanent marks.
However, the 72-hour rule is just the start. Let’s go deeper.
☀️ Factors That Affect Asphalt Curing Time
Weather Conditions – Hot, humid days can prolong curing time. Asphalt stays softer longer in heat. – Cooler, dry weather can speed up the process.
Thickness of the Asphalt Layer – Thicker applications take longer to cure than thinner ones.
Sunlight Exposure – Direct sunlight can accelerate surface drying, but the base layers may still be soft.
Type of Use – Foot traffic can usually resume after 24 hours. – Bicycles or light equipment? Wait at least 48 hours.
🚧 Driving vs. Parking: There’s a Difference
Even after 72 hours, there’s a big difference between driving across your driveway and parking on it.
Driving through: Generally safe after 3 days if it’s a quick pass-through.
Parking your car: You should wait at least 5 to 7 days before parking. This gives the asphalt time to strengthen enough to hold the constant pressure from tires.
⛔ What Happens If You Drive Too Soon?
Here’s what you risk if you can’t resist the temptation to test drive too early:
Tire dents or “scuff marks”
Ruts and depressions in the surface
Reduced lifespan of your driveway
Costly repairs down the line
Think of it like baking a cake—taking it out too soon ruins all your effort (and makes a gooey mess).
🛡️ Tips to Protect Your Fresh Asphalt
Avoid turning your steering wheel while parked. This can create swirl marks.
Keep heavy vehicles (like RVs or moving trucks) off the driveway for at least 2 weeks.
Don’t seal your driveway immediately. Wait 6 months before seal coating to allow proper curing.
Even after the initial curing period, asphalt continues to harden over the next 6–12 months. During this time, it’s still vulnerable to:
Oil spills
Harsh chemicals
Sharp objects or jack stands
Keep the surface clean, avoid sharp turns, and plan to seal coat your driveway in about 6–12 months. This protective layer will lock in the oils, prevent cracking, and extend the life of your investment.
🧰 Mr. Patch Asphalt Is Here to Help!
A new driveway is more than just fresh pavement—it’s an investment in your home’s future. At Mr. Patch Asphalt, we provide expert guidance every step of the way, from installation to maintenance. We offer top-tier services across Massachusetts, including:
Your driveway is one of the most important parts of your home’s exterior, serving both functional and aesthetic purposes. over time, wear and tear can take a toll on its condition, leading to various problems that can affect its appearance and performance. But how do you know when it’s time to replace your driveway rather than just repair it? In this post, we’ll explore the top signs that indicate it’s time for a driveway replacement and the benefits of timely action.
1. Extensive Cracks
Sign: small cracks in your driveway can often be repaired, but if you notice extensive cracking that resembles an alligator’s skin, it’s a sign of underlying structural issues.
Solution: when cracks cover a significant portion of your driveway, it’s time to consider driveway replacement. this ensures a stable, long-lasting surface.
2. Potholes
Sign: potholes not only make your driveway look unkempt but also pose a risk to vehicles and pedestrians. they often indicate severe damage beneath the surface.
Solution: if potholes are numerous and large, replacing the driveway is a better option than attempting multiple repairs. a new driveway will provide a smooth, safe surface.
3. Drainage Issues
Sign: water pooling on your driveway or running towards your home can cause significant damage over time. poor drainage can lead to erosion, cracks, and even foundation problems.
Solution: addressing drainage issues with a new driveway installation can prevent further damage and improve the overall function of your driveway.
4. Severe Discoloration and Fading
Sign: over time, UV rays and weather conditions can cause your driveway to fade and discolor. while seal coating can help, extensive fading is often a sign of aging materials.
Solution: a new asphalt driveway not only looks better but also offers improved performance and longevity.
5. Multiple Repairs
Sign: if you find yourself frequently repairing your driveway, it may be more cost-effective to replace it entirely. continuous repairs can add up and still leave you with a subpar surface.
Solution: investing in a new driveway can save you money in the long run and provide a more durable and aesthetically pleasing result.
6. Safety Hazards
Sign: uneven surfaces, large cracks, and potholes can create tripping hazards for pedestrians and damage vehicles. safety should always be a top priority.
Solution: replacing your driveway ensures a safe, smooth surface that eliminates hazards and enhances the usability of your driveway.
7. Age of the Driveway
Sign: the average lifespan of a driveway varies depending on the material. asphalt driveways typically last 15-20 years, while concrete driveways can last up to 30 years. If your driveway is approaching or exceeding its expected lifespan, it’s time to consider a replacement.
Solution: a professional assessment can help determine if it’s time for a driveway replacement, ensuring you get the most out of your investment.
8. Increased Property Value
Sign: if you’re planning to sell your home, a new driveway can significantly boost curb appeal and increase property value. potential buyers are likely to appreciate a well-maintained, attractive driveway.
Solution: investing in a new driveway can make your home more appealing to buyers and potentially increase your selling price.
When Replacement is the Best Option
Recognizing the signs that it’s time to replace your driveway can save you from ongoing maintenance costs and enhance your property’s value and appearance. Whether dealing with extensive cracks, potholes, drainage issues, or simply the age of your driveway, replacing it can provide a fresh start and long-lasting benefits.
For Homeowners in Middlesex County, Worcester County, and the Greater Boston Area, Mr. Patch Asphalt offers expert driveway installation, driveway replacement, and driveway repair services. contact us today for a free estimate and let our professionals help you achieve the perfect driveway for your home.
Your driveway is one of the most used areas of your home, enduring daily wear and tear from vehicles, weather conditions, and more. Over time, various problems can arise, compromising the appearance and functionality of your driveway. In this post, we’ll explore some of the most common driveway problems and provide practical solutions to fix them, ensuring your driveway remains in excellent condition.
1. Cracks in the Driveway
Problem:
Cracks are one of the most common issues in driveways, caused by factors like weather changes, heavy loads, and the natural settling of the ground.
Solution:
Clean the Cracks: Remove any debris, dirt, or weeds from the cracks using a wire brush or a pressure washer.
Fill the Cracks: Use a high-quality asphalt crack filler for asphalt driveways or a concrete crack filler for concrete driveways. Apply the filler according to the manufacturer’s instructions, making sure to fill the crack completely.
Seal the Driveway: After filling the cracks, apply a sealant to the entire driveway to protect it from future damage. Regular seal coating can extend the life of your driveway and prevent new cracks from forming.
2. Potholes
Problem:
Potholes are depressions in the driveway surface caused by the erosion of the underlying base. They can be a safety hazard and cause damage to vehicles.
Solution:
Clean the Pothole: Remove any loose debris and dirt from the pothole using a shovel and a broom.
Fill the Pothole: For asphalt driveways, use a cold patch asphalt repair product. For concrete driveways, use a concrete patching compound. Fill the pothole in layers, compacting each layer firmly with a tamper.
Seal the Surface: After filling the pothole, apply a sealant to the repaired area to ensure it blends seamlessly with the rest of the driveway and to protect it from future damage.
3. Drainage Issues
Problem:
Poor drainage can lead to water pooling on the driveway, which can cause erosion, cracks, and potholes.
Solution:
Improve Grading: Ensure that your driveway slopes away from your home and towards a drainage point. Regrading may be necessary if the slope is insufficient.
Install Drains: Install trench drains or French drains along the edges of your driveway to direct water away from the surface. This can prevent water from pooling and causing damage.
Maintain Clean Drains: Regularly clean out any drains or gutters around your driveway to ensure they are free from debris and can effectively channel water away.
4. Fading and Discoloration
Problem:
Over time, driveways can fade and become discolored due to exposure to sunlight, chemicals, and weather conditions.
Solution:
Clean the Driveway: Use a pressure washer to clean the surface of your driveway thoroughly. This will remove dirt, stains, and any mold or mildew.
Apply Sealant: After cleaning, apply a high-quality sealant to restore the color and protect the driveway from future fading. For asphalt driveways, use an asphalt sealant; for concrete, use a concrete sealant.
5. Weeds and Grass Growth
Problem:
Weeds and grass can grow through the cracks and joints of your driveway, making it look unkempt and potentially causing further damage.
Solution:
Remove Vegetation: Pull out any weeds and grass growing through the driveway cracks. Use a weed killer if necessary, but be careful to avoid damaging the driveway surface.
Fill Cracks and Joints: After removing the vegetation, fill the cracks and joints with a suitable filler to prevent future growth.
Apply Sealant: Applying a sealant over the entire driveway will help to block weeds and grass from growing through and keep your driveway looking neat and tidy.
Conclusion: Keep your Driveway in Top Condition
Regular maintenance and prompt repairs are essential to keeping your driveway in excellent shape. Whether you’re dealing with cracks, potholes, drainage issues, fading, or weed growth, addressing these problems early can prevent more extensive damage and prolong the life of your driveway.
For homeowners in Middlesex County, Worcester County, and the Greater Boston Area, Mr. Patch Asphalt offers expert driveway repair, driveway replacement, and seal coating services. Contact us today for a free estimate and let our professionals help you maintain a beautiful, durable driveway.
Taking on a DIY driveway project can be a tempting idea for homeowners looking to save money and gain the satisfaction of completing a home improvement task. But is it feasible to DIY your driveway, and what are the potential pitfalls? In this post, we’ll explore the pros and cons of a DIY driveway, the types of driveways suitable for DIY, and why professional installation might be the better choice for long-term durability and quality.
1. Pros of a DIY Driveway
Cost Savings:
One of the main reasons homeowners consider DIY driveways is to save money on labor costs. By doing the work yourself, you can potentially reduce the overall expense of the project.
Sense of Accomplishment:
Completing a driveway project on your own can be incredibly satisfying. It’s a tangible result of your hard work and dedication.
Customization:
DIY projects allow you to have full control over the design and materials used, enabling a customized finish that suits your exact preferences.
2. Cons of a DIY Driveway
Labor Intensive:
Driveway installation is physically demanding work. It involves heavy lifting, precise measurements, and potentially long hours of labor.
Specialized Equipment:
Proper driveway installation requires specialized equipment such as compactors, mixers, and heavy-duty tools that most homeowners do not own. Renting or purchasing this equipment can add to the project cost.
Lack of Expertise:
Professional contractors have years of experience and knowledge that ensure the job is done correctly. Mistakes in installation can lead to costly repairs down the road.
Time-Consuming:
A DIY driveway project can take significantly longer than a professional installation, especially if you are balancing the work with other responsibilities.
3. Types of Driveways Suitable for DIY
Some driveway materials are more suited to DIY projects than others. here’s a look at the most common options:
Gravel Driveways:
Ease of Installation: Gravel is one of the easiest materials for a DIY driveway. It requires less specialized equipment and can be installed with basic tools.
Considerations: Proper grading and compacting are essential to ensure durability.
Concrete Driveways:
Challenge Level: While possible, a DIY concrete driveway is challenging. It requires precise mixing, pouring, and finishing techniques that can be difficult for beginners.
Risks: Mistakes can lead to cracks and an uneven surface.
Paver Driveways:
Feasibility: Installing pavers can be a feasible DIY project if you have patience and attention to detail.
Process: It involves laying a base, placing the pavers in a specific pattern, and ensuring they are level.
Asphalt Driveways:
Recommendation: Asphalt is generally not recommended for DIY due to the need for specialized equipment and expertise in handling hot materials.
Risks: Improper installation can lead to a short lifespan and frequent repairs.
4. Why Professional Installation is often the Better Choice
While DIY can be rewarding, professional installation offers several benefits that often outweigh the potential cost savings:
Expertise and Experience:
Professional contractors bring years of experience and know-how to the job, ensuring a high-quality finish that stands the test of time.
Proper Equipment:
Professionals have access to the necessary tools and machinery to perform the job efficiently and correctly.
Time Efficiency:
Hiring a professional means the job will be completed much faster than a DIY project, minimizing disruption to your daily life.
Long-Term Value:
A professionally installed driveway is more likely to last longer and require fewer repairs, providing better value for your investment.
5. The Benefits of Professional Asphalt Driveways
For homeowners in Middlesex County, Worcester County, and the Greater Boston Area, an asphalt driveway installed by professionals offers a perfect blend of durability, aesthetics, and low maintenance. here’s why you should consider hiring experts for your asphalt driveway:
Durability:
Professional installation ensures that the driveway is built to withstand heavy loads and harsh weather conditions.
Smooth Finish:
Professionals provide a smooth, even surface that enhances the curb appeal of your home.
Low Maintenance:
With proper seal coating and regular care, an asphalt driveway can last 15-20 years or more.
Cost-Effective:
While the initial cost may be higher than a DIY project, the long-term savings on repairs and maintenance make it a cost-effective choice.
Conclusion: DIY vs. Professional Driveway Installation
While a DIY driveway can be a fulfilling project, it comes with significant challenges and potential pitfalls. For those seeking a durable, high-quality driveway with minimal hassle, professional installation is often the best route.
At Mr. Patch Asphalt, we specialize in driveway paving, driveway replacement, and driveway repair. contact us today for a free estimate and to discuss how we can help you achieve the perfect driveway for your home.